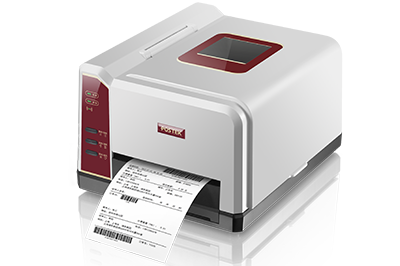
Printing method :Direct Thermal and Thermal Transfer
Printing resolution :600 dpi (OX6)
Highest print speed :18 ips (OX2)


Incorrect printout location
1.Incorrect installation of the media, or improper calibration of media position
1.1 Please ensure the media is properly installed. Refer to the following video for correct installation of the media and ribbon.
After the consumables are installed correctly, please recalibrate the media. The calibration process is as follows: With the printer in standby mode, press and hold the [Media/Calibration] button(about 4 seconds) to initiate the automatic media calibration process. The length of media-fed during the calibration process can be adjusted through the Utility software that comes with the printer(Please refer to the Utility help page for more detail). During the calibration sequence, the [READY], [MEDIA], [RIBBON] indicators will blink simultaneously. When the indicators stop blinking and resume a solid-state, the media calibration process is complete.
2. Incorrect size parameters of the label
Please measure the label’s width and height with a ruler(Width would be the horizontal parameter and the height would be the verticle parameter. The label’s height doesn’t include position guides such as gaps, holes, or blackmarks)
2.1If editing through the label editing software BarTender,① Select "PageSetup" under "File".② The label parameters can be adjusted under the"Page".③ Adjust the "Height" and "Width" parameters as needed.④ Under the "Layout" tab,⑤ adjust "Rows", "Columns",⑥ "Margins-Left", "Margins-Right",and⑦ "Gap-Horizontal" parametersas needed.After the necessary parameters have been adjusted,⑧ click "OK" to confirm your parameter adjustments.


2.2 If printing through third-party software, select the Printing Preferences page in the printer driver. Underneath ① "Page Setup", click on ② "New" or "Edit", and input the label ③ "Width and Height" parameters. Click on ④ "OK" to confirm your parameter changes.

3. Printout with verticle positional deviations
Refer to the following steps if the printout has positional deviations along the direction that the label is feeding out of the printer while media calibration and label size parameters are completed through the steps provided above. The reason that leads to such printout position deviation might be the setting of media type“Continuous”in editor software or printer driver.
3.1 If printing through the label editing software "Bartender", click the ① printing icon " ", in the pop-up window, click on the tab ② "Document Properties", then click on ③ "Stock", set the ④ "MediaType" to "LabelWithGaps", then click on ⑤ "OK".

3.2If printing through third-party software, select thePrintingPreference page in the printer driver. Select the tab ① "Stock" and set ② "MediaType" to "LabelWithGaps", click on ③ "OK".

4. If the problem persists after the steps mentioned above
One potential remedy is to adjust the printout position through the printer control software "Utility".
4.1 Setting the horizontal positional offset for the printout
Based on the actual position of the printout, there may be situations where the position of the printout needs to be moved left or right horizontally. This can be achieved by setting ① " Horizontal Offset". After the parameter has been adjusted, click on ④ "Send to Printer" to relay the information to the printer. The [MEDIA] and [RIBBON] indicators will begin blinking simultaneously, After the indicators resume their solid-state, press the [Feed/Calibration] button once, then the printer is ready for printing.
4.2 Setting the vertical positional offset for the printout
Based on the actual position of the printout, there may be situations where the position of the printout needs to be moved up or down vertically. This can be achieved by setting ② "VerticalOffset" or ③ "Feed Offset". After the parameter has been adjusted, click on ④ "Send toPrinter" to relay the information to the printer. The [MEDIA] and [RIBBON] indicators will begin blinking simultaneously, After the indicators resume their solid-state, press the [Feed/Calibration] button once, then the printer is ready for printing.

Note: “Horizontal offset” adjusts for the horizontal positioning of the printout (i.e. the left (negative value setting) or right (positive value setting) on the label when facing the front of the printer). "Vertical offset" adjusts for the vertical positioning of the printout (i.e. up or down on the label when facing the front of the printer), only positive value can be set to move printout position upward. "Feed Offset" refers to the offset of the start position detected by the media sensor. This would affect the feed direction of the printout (i.e. positive value will set the printout direction in upward while negative value will set printout direction to be downward.
POSTEK printer companion app —— Utility downloaded link.
5. Reset to factory default
To reset the printer to factory default settings, return the printer to standby mode, then press and hold the [Cancel/Reset] button for 4 seconds or until the [READY], [MEDIA], and [RIBBON] indicator starts blinking simultaneously (if no further action is taken within the next 4 seconds, the printer would return to its standby state), release and press the [Cancel/Reset] button until the [READY] indicator turns off while the [MEDIA] and [RIBBON] indicator starts blinking simultaneously. Restart the printer, and the printer is reset to factory default. After the reset, please recalibrate the media before printing.
6.Technical support
If all the potential remedies mentioned above doesn’t resolve your issue, please reach out to us on our official website for technical support.